Oven Slow-Cooked BBQ Ribs
- Tammy Guill
- May 21, 2017
- 4 min read

Putting barbecue sauce on ribs is always optional, but since these are cooked in an oven and not in a smoker or on a grill, you may want a little extra flavor. Barbecue sauce will add that extra flavor, making them taste more like smoked or grilled ribs. Opt for a good quality barbecue sauce for ribs. The sauce you use should match the flavors of the rub that was used at the beginning. I used fresh made Kansas City Rib Rub and Kansas City BBQ sauce also found on this page…OMG, SOOOOO GOOD!
What you will need:
A rack of ribs*
1/2 cup of rib rub
1 cup barbecue sauce
A large cooking tray or cookie sheet
A wire cooling rack
Aluminum foil
A sharp knife
A basting brush
Up to 5 hours for prep and cooking
*The rack of ribs can be baby back or spareribs. The pictures here are spareribs. Baby back ribs are smaller, have less meat, and will require a shorter cooking time. Two racks of ribs can be done at the same time without altering the cooking time as long as there is at least an inch between them.
Step 1 – Apply Rub
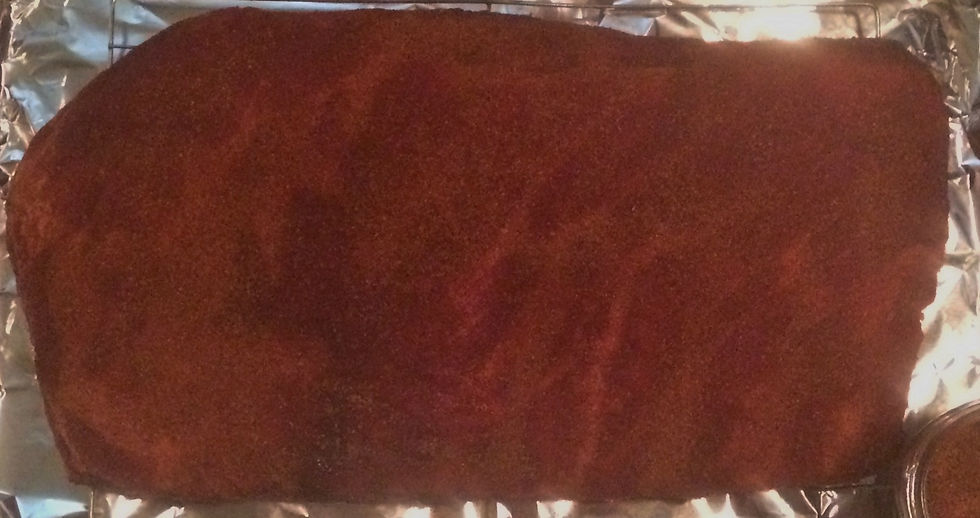
Apply a good coating of rub. The general rule with rubs is, what sticks is how much you need. This rub will combine with the juices from the ribs and will penetrate into the surface and start the crusting process.

Ribs should be elevated to cook so that air can flow over and under the meat. This means that the ribs will not need to be flipped or turned during the cooking process. Line a large cooking tray or cookie sheet with aluminum foil (for easy clean up) and place a large cooling rack on top of the foil. The ribs will sit on the rack.
Step 2 – Broiling
Generally, we could just place the ribs in the oven to cook and they would turn out great, but a quick pass under the broiler will crisp up the surface and start to caramelize the sugar in the rub. If your oven doesn't have a broiler this step can be skipped. Remember that sugar burns at 265° F. This means that it is very important to keep a close eye on the ribs under the broiler to ensure that nothing gets burned. Preheat the broiler in your oven before placing the ribs under it. The rub should start to bubble and sizzle. This is the perfect time to remove the ribs, before anything starts to burn and smoke. It might be necessary to turn the rack around to get an even sear on the top surface of the ribs, but don't worry about flipping them over. We are only interested in crusting the top surface.

Step 3 – Baking
Allow the oven to cool back down to 250° F. This is the temperature at which you will cook the ribs. Half the time will be uncovered. At the midpoint of cooking, cover the ribs with a sheet of aluminum foil.

They don't need to be wrapped tightly, just covered and tucked around the edges. This will hold the moisture rising from the ribs under the foil and prevent them from drying out. It will not steam the ribs, however.
Cooking Times:
Spareribs - Approximate total cooking time of 4 hours.
Baby back ribs - Approximate total cooking time of 3 1/2 hours.
When the ribs are completely cooked, the rack will be limp if picked up on the end, but will not tear or separate. The meat will have pulled away from the bone ends by about 1/4 to 1/2 of an inch. Temperature checking ribs is not easy because the bones will be at a different temperature than the meat, but if you do use a meat thermometer, look for a temperature above 165° F. If the temperature is above this, don't worry. Overcooking isn't a problem, we just don't want the ribs to dry out.
Step 4 – Saucing Ribs
To sauce the ribs, remove the cooking tray from the oven and brush the sauce thickly over both sides of the ribs. Get it all over! Then return the ribs, uncovered, to the oven to bake the sauce in.

This step can be repeated several times to layer the sauce in and to create a sticky, messy rib that everyone will enjoy. Reduce the oven temperature to 200°F for repeated saucing. Barbecue sauces, like the rub, will burn at high temperature so it is best to keep the cooking temperature low.
Allow 10 to 15 minutes of cooking time between each saucing.
Step 5 – Cutting
With the ribs completely cooked it is time to remove them. Unlike meats cooked at high temperatures, these should go from the oven to the cutting board to the plate (or hand) as quickly as possible. The best way to slice ribs is by standing them upright on their side with the exposed bone end up. A good sharp knife should slide down between the ribs easily. If you have the bone side towards you it is easier to see where to cut.
Additional barbecue sauce can be added if desired or served with the ribs for people to add as they like. Barbecue sauce is also a great fix for ribs that seem a little dry!


Comments